
Introduction
K8s lifecycle is something people are still struggling with, despite amazing tools out there like kubeadm which take care of the K8s setup itself, we are still lacking something fundamental - they day-0 setup.
Who/what actually creates the VMs and installs the packages on them so we can get to the stage that we can use kubeadm?
Typically it’s up to the user, and as such can vary wildly - so how can that experience be improved, and even better - totally automated and declarative.
Imagine entering a single command and regardless of your cloud provider - it would take care of VM setup, OS installation and K8s bootstrapping, cluster membership as well as cloud provider setup for storage provisioning.
Couple that with the ability to expand and delete clusters through the same utility, well, that all sounds pretty compelling doesn’t it?
N.B: Keep in mind this is an early alpha-stage prototype, the final experience will be different to that exhibited below
This as was the case with the cloud-init post, is a replacement for part 1 and part 2.
ClusterAPI (CAPI)
Enter ClusterAPI ↗, the tool that is going to answer all the above questions. To quote the page itself:
The Cluster API is a Kubernetes project to bring declarative, Kubernetes-style APIs to cluster creation, configuration, and management.
Before we get into it, CAPI is still experimental and subject to change but has made tremenduous progress recently with providers implementing CAPI for their own cloud platforms, today we’re going to look at ClusterAPI for vSphere (CAPV).
Management Clusters and Workload Clusters
ClusterAPI makes the distinction between management and workload K8s clusters.
management clusters are used by you to create workload clusters - think of them as being the control plane for ClusterAPI - you send some yaml files to the management cluster and it will create a workload K8s cluster for you.
workload clusters are what they sound like - K8s clusters you run actual workloads on and are provisioned for you via the management cluster.
We are going to be deploying a management cluster first, then use it to deploy our workload cluster!
ClusterAPI vSphere (CAPV)
ClusterAPI vSphere (CAPV) ↗ is a CAPI implementation for vSphere. What that means is - it uses the CAPI framework and translates it into things that vSphere can understand, essentially giving us all the goodness of the CAPI feature-set on vSphere.
While we are here, the work that’s being done on CAPV is at a break-neck pace, I have the pleasure of asking quesitons of the team involved and reporting bugs, they are fantastic and stuff is usually fixed in <24 hours!
Special thanks to Andrew Kutz ↗ and Andrew Sy Kim ↗ for their excellent work, helping me so much along the way and dealing with by bug reports :)
Prerequisites
Tools
I am using macOS, so will be using the brew package manager to install and manage my tools, if you are using Linux or Windows, use the appropriate install guide for each tool, according to your OS.
For each tool I will list the brew install command and the link to the install instructions for other OSes.
- brew
- git -
brew install git - go -
brew install go - govc -
brew tap govmomi/tap/govc && brew install govmomi/tap/govc - kubectl -
brew install kubernetes-cli - kind (Kubernetes-in-Docker) - No brew installer yet
Kind installation
kind hasn’t been bundled into brew, yet - so we need to install it the old-fashioned way (this is for macOS, as an example):
curl -Lo ./kind-darwin-amd64 https://github.com/kubernetes-sigs/kind/releases/download/v0.3.0/kind-darwin-amd64
chmod +x ./kind-darwin-amd64
mv ./kind-darwin-amd64 /usr/local/bin/kind
Environment Setup
Now that we understand what ClusterAPI does, let’s jump into actually using CAPV to deploy a K8s cluster on vSphere!
Pull down the OS image
CAPV image templates can be found here ↗ and come in two flavours currently, CentOS and Ubuntu, i’m downloading and using an Ubuntu 18.04 version with K8s v1.15.0:
wget https://storage.googleapis.com/capv-images/release/v1.15.0/ubuntu-1804-kube-v1.15.0.ova -P ~/Downloads/
Set up vSphere with govc
Fill in the appropriate environment variables for your vSphere environment to allow us to connect with govc (I put this in a file called govcvars.sh):
export GOVC_INSECURE=1
export GOVC_URL=vc01.satm.eng.vmware.com
export GOVC_USERNAME=administrator@vsphere.local
export GOVC_PASSWORD=P@ssw0rd
export GOVC_DATASTORE=vsanDatastore
export GOVC_NETWORK="Cluster01-LAN-1-Routable"
export GOVC_RESOURCE_POOL='cluster01/Resources'
export GOVC_DATACENTER=DC01
Import the env vars into our shell and connect to the vCenter with govc:
source govcvars.sh
govc about
Now that we’re connected to vCenter, let’s create some folders for our templates and cluster VMs to live in:
govc folder.create /$GOVC_DATACENTER/vm/Templates
govc folder.create /$GOVC_DATACENTER/vm/Testing
govc folder.create /$GOVC_DATACENTER/vm/Testing/K8s
Customise and import the template VM
Extract the OVF spec from the template and change the Name, Network and Annotation to your liking - i’ve also changed MarkAsTemplate to true as that’s what it’s going to end up as anyway - may as well do it on import!
I’m going to assume you named it the same as mine (ubuntu-18.04-kube-1.15.0) for the rest of this blog, so if you haven’t keep and eye out and change those as we go along.
govc import.spec ~/Downloads/ubuntu-1804-kube-v1.15.0.ova | python -m json.tool > ubuntu.json
Edit the ubuntu.json to reflect your preferences:
{
    "DiskProvisioning": "thin",
    "IPAllocationPolicy": "dhcpPolicy",
    "IPProtocol": "IPv4",
    "NetworkMapping": [
        {
            "Name": "nic0",
            "Network": "Cluster01-LAN-1-Routable"
        }
    ],
    "Annotation": "Cluster API vSphere image - Ubuntu 18.04 and Kubernetes - https://github.com/kubernetes-sigs/cluster-api-provider-vsphere/blob/master/docs/machine_images.md",
    "MarkAsTemplate": true,
    "PowerOn": false,
    "InjectOvfEnv": false,
    "WaitForIP": false,
    "Name": "ubuntu-18.04-kube-1.15.0"
}
Let’s import the template we just downloaded into VC and the folder that we just created:
govc import.ova -folder /$GOVC_DATACENTER/vm/Templates -options ubuntu.json ~/Downloads/ubuntu-1804-kube-v1.15.0.ova
Using ClusterAPI
Build clusterctl
The command line interface that you use with ClusterAPI is called clusterctl, for now (early alpha, remember?) this needs to be built from the git repo, so let’s clone it down:
git clone git@github.com:kubernetes-sigs/cluster-api-provider-vsphere.git
cd cluster-api-provider-vsphere
git checkout tags/v0.3.0-beta.0
Build the clusterctl binary by running the following make command in the root folder of the cloned repository:
GOOS=$(go env GOOS) make clusterctl-in-docker
Temporarily add the file that was output to our shell PATH so we can use it:
export PATH="$PATH:$(pwd)/bin"
Check it’s working by seeing the help output:
clusterctl -h
Management Cluster
Define your K8s Cluster Specification
clusterctl is good to go - let’s define where our cluster should be deployed, the name of it, K8s version and how many resources it should have by filling in the following environment variables (I put the below in a file called mgmt-cluster-vars.sh) - change the below to suit your environment:
# K8s attributes
export CLUSTER_NAME=capv-mgmt-example
export KUBERNETES_VERSION=1.15.0

# vSphere attributes
export VSPHERE_USER=administrator@vsphere.local
export VSPHERE_PASSWORD=P@ssw0rd
export VSPHERE_SERVER=vc01.satm.eng.vmware.com

# VM deployment options
export VSPHERE_DATACENTER=DC01
export VSPHERE_DATASTORE=vsanDatastore
export VSPHERE_NETWORK="Cluster01-LAN-1-Routable"
export VSPHERE_RESOURCE_POOL="cluster01/Resources/CAPV"
export VSPHERE_FOLDER="/$(echo $VSPHERE_DATACENTER)/vm/Testing/K8s/$(echo $CLUSTER_NAME)"
export VSPHERE_TEMPLATE="ubuntu-18.04-kube-1.15.0"
export VSPHERE_DISK_GIB=60
export VSPHERE_NUM_CPUS="2"
export VSPHERE_MEM_MIB="2048"
Import the variables into your shell session:
source mgmt-cluster-vars.sh
Export your SSH public key so that when the VMs are created you’ll be able to SSH into them (should you need to debug anything):
export SSH_AUTHORIZED_KEY="$(cat ~/.ssh/id_rsa.pub)"
Create a folder for the VMs on vSphere for the management cluster:
govc folder.create $VSPHERE_FOLDER
Generate the yaml files required for ClusterAPI to spin up our management K8s cluster:
$ make prod-yaml
CAPV_MANAGER_IMAGE=gcr.io/cnx-cluster-api/vsphere-cluster-api-provider:0.3.0-beta.0 hack/generate-yaml.sh
done generating ./out/capv-mgmt-example/addons.yaml
done generating ./config/default/capv_manager_image_patch.yaml
done generating ./out/capv-mgmt-example/cluster.yaml
done generating ./out/capv-mgmt-example/machines.yaml
done generating ./out/capv-mgmt-example/machineset.yaml
Done generating ./out/capv-mgmt-example/provider-components.yaml

*** Finished creating initial example yamls in ./out/capv-mgmt-example

    The files ./out/capv-mgmt-example/cluster.yaml and ./out/capv-mgmt-example/machines.yaml need to be updated
    with information about the desired Kubernetes cluster and vSphere environment
    on which the Kubernetes cluster will be created.

Enjoy!
This has placed the yaml files in a new directory ./out, so let’s finally use clusterctl to spin up a brand new management K8s cluster:
Create the Management Cluster
cd out/

clusterctl create cluster --provider vsphere --bootstrap-type kind --kubeconfig-out $CLUSTER_NAME/kubeconfig -c $CLUSTER_NAME/cluster.yaml -m $CLUSTER_NAME/machines.yaml -p $CLUSTER_NAME/provider-components.yaml -a $CLUSTER_NAME/addons.yaml
This will take in the order of 5-10 minutes depending on your environment, it will create a kind single node K8s cluster on your local machine within a Docker container to act as a bootstrap.
It then creates another single-node K8s VM on your target vSphere environment with the same configuration, and deletes the kind cluster from your local machine, because it was only there to act as a bootstrap.
At this point, clusterctl will spit out the kubeconfig for your management cluster into your current directory and you should be able to connect to your ClusterAPI “management” cluster:
Export the newly downloaded kubeconfig file so it’s the default for kubectl to use:
export KUBECONFIG=$CLUSTER_NAME/kubeconfig
Check to see that the ClusterAPI items have been created (i.e. one cluster and one machine) for the management cluster.
kubectl get clusters
kubectl get machines
Workload Clusters
Define your Workload Cluster Specification
With the ClusterAPI management cluster deployed, we can now use it, along with kubectl to create other K8s workload clusters!
Again, like with the management cluster, we need to export some environment variables to our shell in order to define what the workload K8s cluster will look like, things like its name, K8s version, where it lives in vSphere as well as the resources assigned to the nodes. I put all this in a file called workload-cluster-01-vars.sh - change the below to suit your needs:
# K8s attributes
export CLUSTER_NAME=workload-cluster-01
export KUBERNETES_VERSION=1.15.0

# vSphere attributes
export VSPHERE_USER=administrator@vsphere.local
export VSPHERE_PASSWORD=P@ssw0rd
export VSPHERE_SERVER=vc01.satm.eng.vmware.com

# VM deployment options
export VSPHERE_DATACENTER=DC01
export VSPHERE_DATASTORE=vsanDatastore
export VSPHERE_NETWORK="Cluster01-LAN-1-Routable"
export VSPHERE_RESOURCE_POOL="cluster01/Resources/CAPV"
export VSPHERE_FOLDER="/$(echo $VSPHERE_DATACENTER)/vm/Testing/K8s/$(echo $CLUSTER_NAME)"
export VSPHERE_TEMPLATE="ubuntu-18.04-kube-1.15.0"
export VSPHERE_DISK_GIB=60
export VSPHERE_NUM_CPUS="4"
export VSPHERE_MEM_MIB="4096"
Like last time, again import the environment variables from above into your shell session and create a vSphere VM folder for the cluster to live in:
workload-cluster-01-vars.sh
govc folder.create $VSPHERE_FOLDER
And generate the yaml file required by ClusterAPI to specify the workload cluster itself - this command will output the files into a directory named after your CLUSTER_NAME variable from above:
../hack/generate-yaml.sh -c $CLUSTER_NAME
Create the Workload Cluster
Let’s use the ClusterAPI management cluster (note: we are passing in --kubeconfig kubeconfig which correlates to our management cluster) to create our new workload cluster - we do this by passing in the yaml that was just generated to the management cluster, the ClusterAPI controller within the management cluster will then look at the specifications for each and create a new K8s cluster with the number of masters and workers as defined in machines.yaml and machineset.yaml respectively.
kubectl --kubeconfig capv-mgmt-example/kubeconfig apply -f $CLUSTER_NAME/cluster.yaml
kubectl --kubeconfig capv-mgmt-example/kubeconfig apply -f $CLUSTER_NAME/machines.yaml
kubectl --kubeconfig capv-mgmt-example/kubeconfig apply -f $CLUSTER_NAME/machineset.yaml
We can check to make sure we now have two clusters known to ClusterAPI, a management cluster and the workload cluster we just imported:
$ kubectl --kubeconfig capv-mgmt-example/kubeconfig get cluster
NAME                  AGE
capv-mgmt-example     20m
workload-cluster-01   2m10s
If we query ClusterAPI’s machines CRD we can see that it will have created a master and two workers if you left the generated yaml files as default:
$ kubectl --kubeconfig capv-mgmt-example/kubeconfig get machines
NAME                                     PROVIDERID   PHASE
capv-mgmt-example-controlplane-1
workload-cluster-01-controlplane-1
workload-cluster-01-machineset-1-cdg7h
workload-cluster-01-machineset-1-hrx5p
If you like you can change the get to a describe on one of the nodes to view it’s full output and events (at the bottom):
$ kubectl --kubeconfig capv-mgmt-example/kubeconfig describe machine workload-cluster-01-machineset-1-hrx5p
Name:         workload-cluster-01-machineset-1-hrx5p
Namespace:    default
Labels:       cluster.k8s.io/cluster-name=workload-cluster-01
              machineset-name=workload-cluster-01-machineset-1
Annotations:  <none>
API Version:  cluster.k8s.io/v1alpha1
Kind:         Machine
Metadata:
  Creation Timestamp:  2019-06-27T14:36:44Z
  Finalizers:
    foregroundDeletion
    machine.cluster.k8s.io
  Generate Name:  workload-cluster-01-machineset-1-
  Generation:     3
  Owner References:
    API Version:           cluster.k8s.io/v1alpha1
    Block Owner Deletion:  true
    Controller:            true
    Kind:                  MachineSet
    Name:                  workload-cluster-01-machineset-1
    UID:                   4aca1d8a-d218-4e30-a129-19ec366e00ab
  Resource Version:        2277
  Self Link:               /apis/cluster.k8s.io/v1alpha1/namespaces/default/machines/workload-cluster-01-machineset-1-hrx5p
  UID:                     ffde77a9-eaf6-4f00-9365-bf833ad55d73
Spec:
  Metadata:
    Creation Timestamp:  <nil>
  Provider Spec:
    Value:
      API Version:  vsphereproviderconfig/v1alpha1
      Kind:         VsphereMachineProviderConfig
      Kubeadm Configuration:
        Init:
          Local API Endpoint:
            Advertise Address:
            Bind Port:          6443
          Node Registration:
        Join:
          Ca Cert Path:
          Discovery:
            Bootstrap Token:
              API Server Endpoint:  10.198.25.80:6443
              Ca Cert Hashes:
                sha256:46b6094f3affad00fb1fa90e30bacf50113acad054c546ff459e9349ae9f4391
              Token:                        defrcl.o352jo0ulzjrszyq
              Unsafe Skip CA Verification:  false
            Tls Bootstrap Token:
          Node Registration:
            Cri Socket:  /var/run/containerd/containerd.sock
            Kubelet Extra Args:
              Cloud - Provider:  vsphere
              Node - Labels:     node-role.kubernetes.io/node=
            Name:                {{ ds.meta_data.hostname }}
      Machine Spec:
        Datacenter:  DC01
        Datastore:   vsanDatastore
        Disk Gi B:   60
        Disks:       <nil>
        Memory MB:   4096
        Network:
          Devices:
            dhcp4:         true
            Network Name:  Cluster01-LAN-1-Routable
        Num CP Us:         4
        Resource Pool:     cluster01/Resources/CAPV
        Template:          ubuntu-18.04-kube-1.15.0
        Vm Folder:         /DC01/vm/Testing/K8s/workload-cluster-01
      Metadata:
        Creation Timestamp:  <nil>
  Versions:
    Kubelet:  1.15.0
Status:
  Provider Status:
    Metadata:
      Creation Timestamp:  <nil>
    Task Ref:              task-414680
Events:
  Type    Reason         Age                  From                Message
  ----    ------         ----                 ----                -------
  Normal  CreateRequeue  51s (x4 over 2m42s)  vsphere-controller  requeued Create
  Normal  UpdateSuccess  37s (x2 over 2m42s)  vsphere-controller  updated machine config "default/workload-cluster-01/workload-cluster-01-machineset-1-hrx5p"
  Normal  UpdateSuccess  37s                  vsphere-controller  updated machine status for machine "default/workload-cluster-01/workload-cluster-01-machineset-1-hrx5p"
  Normal  CreateSuccess  37s                  vsphere-controller  Create success
  Normal  ExistsSuccess  17s (x7 over 2m42s)  vsphere-controller  Exists success
  Normal  UpdateRequeue  17s (x2 over 37s)    vsphere-controller  requeued Update
Connecting to the Workload Cluster
We’ve successfully provisioned our workload cluster, but how do we access and use it?
Good question, when using ClusterAPI to spin up workload clusters, it needs to put the access credentials (i.e. the kubeconfig file) somewhere, so it puts them in a K8s secret, luckily they are very easy to retrieve and decode to your local machine.
First let’s query the kubeconfig files held on the management cluster (if yours isn’t showing up yet, it only populates after the workload cluster spins up, so check back):
$ kubectl --kubeconfig capv-mgmt-example/kubeconfig -n default get secrets
NAME                             TYPE                                  DATA   AGE
capv-mgmt-example-kubeconfig     Opaque                                1      33m
default-token-9nt25              kubernetes.io/service-account-token   3      34m
workload-cluster-01-kubeconfig   Opaque                                1      13m
Notice the workload-cluster-01-kubeconfig secret - this is what we want to connect to our workload cluster, it’s very easy to extract and pull this to your local machine. The below command pulls the secret value which is base64 encoded in K8s - decodes it from base64 to text and creates a new kubeconfig file named after your workload cluster, in your current directory.
kubectl --kubeconfig capv-mgmt-example/kubeconfig -n default get secret $CLUSTER_NAME-kubeconfig -o jsonpath='{.data.value}' | base64 -D > $CLUSTER_NAME/kubeconfig
Let’s apply the addons to our workload cluster (these are mainly just the networking overlay, Calico) - required to let pods talk to one-another (note: this uses the kubeconfig file we just downloaded to connect to the workload cluster):
kubectl --kubeconfig $CLUSTER_NAME/kubeconfig apply -f $CLUSTER_NAME/addons.yaml
And watch as the pods get spun up, when it’s all working - everything should list as Running:.
kubectl --kubeconfig $CLUSTER_NAME/kubeconfig get pods -n kube-system -w
Verify vSphere Cloud Provider Setup
Let’s ensure the vSphere Cloud Provider ↗ is fully setup and functional by querying the cloud-provider ProviderID from the nodes (as long as this returns some values, it’s worked):
kubectl --kubeconfig $CLUSTER_NAME/kubeconfig describe nodes | grep "ProviderID"
Deploy some applications
Now that the workload cluster is set up, we can deploy some apps to it - because ClusterAPI also takes care of the VCP setup, we can even deploy ones that use persistent storage!
We’re going to deploy use helm to set up an application called RocketChat on the cluster, which uses two persistent volumes, one for config and one for its MongoDB database.
Configure helm
Be aware this installation style for helm (granting the tiller pod cluster-admin privileges) is a big security no-no ↗ and is just for ease of setup here. For more information on why this is bad, look here ↗, and please don’t do this on a production cluster.
In this case, it is a throwaway cluster for me, so I will be using these permissions. First create the RBAC role and permissions for the helm service account in another new file called helm-rbac.yaml:
apiVersion: v1
kind: ServiceAccount
metadata:
  name: tiller
  namespace: kube-system
---
apiVersion: rbac.authorization.k8s.io/v1
kind: ClusterRoleBinding
metadata:
  name: tiller
roleRef:
  apiGroup: rbac.authorization.k8s.io
  kind: ClusterRole
  name: cluster-admin
subjects:
  - kind: ServiceAccount
    name: tiller
    namespace: kube-system
Apply the role to the cluster:
$ kubectl --kubeconfig $CLUSTER_NAME/kubeconfig create -f helm-rbac.yaml
serviceaccount/tiller created
clusterrolebinding.rbac.authorization.k8s.io/tiller created
Let’s install helm onto the cluster with the service account we provisioned:
$ helm --kubeconfig $CLUSTER_NAME/kubeconfig init --service-account tiller
$HELM_HOME has been configured at /Users/mylesgray/.helm.

Tiller (the Helm server-side component) has been installed into your Kubernetes Cluster.

Please note: by default, Tiller is deployed with an insecure 'allow unauthenticated users' policy.
To prevent this, run `helm init` with the --tiller-tls-verify flag.
For more information on securing your installation see: https://docs.helm.sh/using_helm/#securing-your-helm-installation
Happy Helming!
Configure a StorageClass
Now that helm is installed and running - we need to create a StorageClass to tell K8s where to provision the PersistentVolumes to (more info on StorageClasses and PersistentVolumes here ↗) - i’m using vSAN and have a SPBM policy called vSAN Default Storage Policy - my file is called vsan-default-sc.yaml:
kind: StorageClass
apiVersion: storage.k8s.io/v1
metadata:
  name: vsan-default
  annotations:
    storageclass.kubernetes.io/is-default-class: "true"
provisioner: kubernetes.io/vsphere-volume
parameters:
    storagePolicyName: "vSAN Default Storage Policy"
    datastore: vsanDatastore
Once you’ve created the above StorageClass file, import it into the workload cluster:
kubectl --kubeconfig $CLUSTER_NAME/kubeconfig apply -f vsan-default-sc.yml
Provision an application
We’re now in a place where we can provision an application, we’re going to use helm to install RocketChat, as discussed above - RocketChat is basically an Open-Source Slack clone that you can run on-prem.
The below command tells helm to install RocketChat from the stable/rocketchat repository, give it a name, set the passwords for MongoDB and most critically - use the vsan-default StorageClass that we just imported into the workload cluster to back the PersistentVolumes requested by RocketChat:
helm --kubeconfig $CLUSTER_NAME/kubeconfig install --name rocketchat stable/rocketchat --set mongodb.mongodbPassword=rocketchat,mongodb.mongodbRootPassword=rocketchat --set persistence.storageClass=vsan-default --set mongodb.persistence.storageClass=vsan-default
Verify the volumes got provisioned (this will take a minute before it returns back the “Bound” status):
$ kubectl --kubeconfig $CLUSTER_NAME/kubeconfig get pv,pvc
NAME                                                        CAPACITY   ACCESS MODES   RECLAIM POLICY   STATUS   CLAIM                                            STORAGECLASS   REASON   AGE
persistentvolume/pvc-a5e193b2-9804-11e9-8e11-0050569c242e   8Gi        RWO            Delete           Bound    default/datadir-rocketchat-mongodb-primary-0     vsan-default            16m
persistentvolume/pvc-a5e72e14-9804-11e9-8e11-0050569c242e   8Gi        RWO            Delete           Bound    default/datadir-rocketchat-mongodb-secondary-0   vsan-default            16m

NAME                                                           STATUS   VOLUME                                     CAPACITY   ACCESS MODES   STORAGECLASS   AGE
persistentvolumeclaim/datadir-rocketchat-mongodb-primary-0     Bound    pvc-a5e193b2-9804-11e9-8e11-0050569c242e   8Gi        RWO            vsan-default   16m
persistentvolumeclaim/datadir-rocketchat-mongodb-secondary-0   Bound    pvc-a5e72e14-9804-11e9-8e11-0050569c242e   8Gi        RWO            vsan-default   16m
And the pods for the application should be running:
kubectl --kubeconfig $CLUSTER_NAME/kubeconfig get po
NAME                                     READY   STATUS    RESTARTS   AGE
rocketchat-mongodb-arbiter-0             1/1     Running   0          57s
rocketchat-mongodb-primary-0             1/1     Running   0          57s
rocketchat-mongodb-secondary-0           1/1     Running   0          57s
rocketchat-rocketchat-5dcf4664c5-x9sl5   1/1     Running   0          57s
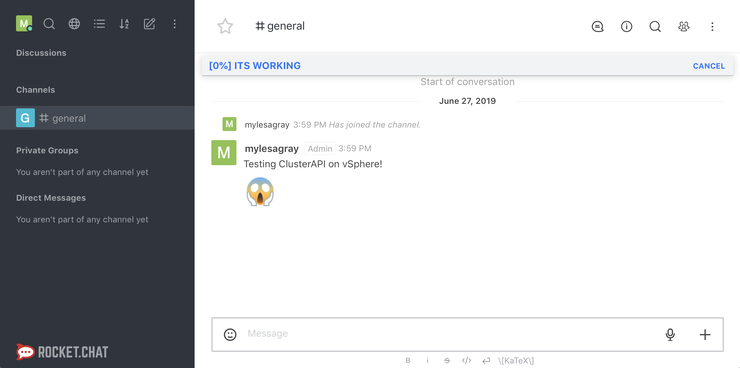
At this point, we can access the application by port-forwarding to the rocketchat-rocketchat-* pod from the output above (change this to suit your pod name):
kubectl --kubeconfig $CLUSTER_NAME/kubeconfig port-forward rocketchat-rocketchat-5dcf4664c5-x9sl5 8888:3000
Access the application on localhost:8888 in your web browser:
open http://localhost:8888
Scaling out a Workload Cluster
What else can we do with ClusterAPI? How about you’ve decided that workload cluster you deployed isn’t meaty enough - and you want some more worker nodes? No problem. All we have to do is update the replicas in machineset.yaml to the desired number of workers, by default it’s 2 - let’s change it to 5.
sed -i '' 's/replicas: 2/replicas: 5/g' workload-cluster-01/machineset.yaml
And deploy the changes to the ClusterAPI management cluster (which will create the new machines in the workload cluster for us):
kubectl --kubeconfig capv-mgmt-example/kubeconfig apply -f $CLUSTER_NAME/machineset.yaml
We can check to make sure it did what we asked by querying the machines that the management cluster is keeping track of:
$ kubectl --kubeconfig capv-mgmt-example/kubeconfig get machines
NAME                                     PROVIDERID   PHASE
capv-mgmt-cluster-controlplane-1
workload-cluster-01-controlplane-1
workload-cluster-01-machineset-1-255cx
workload-cluster-01-machineset-1-8269f
workload-cluster-01-machineset-1-96kf4
workload-cluster-01-machineset-1-g8xkx
workload-cluster-01-machineset-1-qxvkw
And we can watch our workload cluster as the nodes come up (this took around two minutes for me):
$ kubectl --kubeconfig $CLUSTER_NAME/kubeconfig get nodes -o wide -w
NAME                                     STATUS   ROLES    AGE     VERSION   INTERNAL-IP    EXTERNAL-IP    OS-IMAGE             KERNEL-VERSION      CONTAINER-RUNTIME
workload-cluster-01-controlplane-1       Ready    master   41m     v1.15.0   10.198.25.80   10.198.25.80   Ubuntu 18.04.2 LTS   4.15.0-52-generic   containerd://1.2.5
workload-cluster-01-machineset-1-cdg7h   Ready    node     39m     v1.15.0   10.198.25.81   10.198.25.81   Ubuntu 18.04.2 LTS   4.15.0-52-generic   containerd://1.2.5
workload-cluster-01-machineset-1-d69mg   Ready    node     2m15s   v1.15.0   10.198.25.96   10.198.25.96   Ubuntu 18.04.2 LTS   4.15.0-52-generic   containerd://1.2.5
workload-cluster-01-machineset-1-h2qjj   Ready    node     2m58s   v1.15.0   10.198.25.83   10.198.25.83   Ubuntu 18.04.2 LTS   4.15.0-52-generic   containerd://1.2.5
workload-cluster-01-machineset-1-hrx5p   Ready    node     39m     v1.15.0   10.198.25.82   10.198.25.82   Ubuntu 18.04.2 LTS   4.15.0-52-generic   containerd://1.2.5
workload-cluster-01-machineset-1-pbp8w   Ready    node     2m17s   v1.15.0   10.198.25.95   10.198.25.95   Ubuntu 18.04.2 LTS   4.15.0-52-generic   containerd://1.2.5
And of course, they all come up with the vSphere Cloud Provider installed, configured and functional:
$ kubectl --kubeconfig $CLUSTER_NAME/kubeconfig describe nodes | grep "ProviderID"
ProviderID:                  vsphere://421c0e70-107e-32d2-e49f-2a1d9c88455f
ProviderID:                  vsphere://421c5547-dcb0-a0d9-a660-bcc348ad04a6
ProviderID:                  vsphere://421c93ae-1811-140c-ff5a-dc7c036b5a94
ProviderID:                  vsphere://421c461e-ab2c-5f55-5c4e-3593fa9c0150
ProviderID:                  vsphere://421cc8b4-eb7c-74cd-eaaa-5e1cd421a1d6
ProviderID:                  vsphere://421cd848-5a0c-0bfd-e5ea-f188ce482e9e
Troubleshooting
Bootstrap Cluster
When deploying the initial management cluster, it can be useful to debug and find out where things went wrong if it hung up, there is one main place you can do this, because ClusterAPI uses kind to bootstrap the management cluster, we can query its pods to find out what’s going on with provisioning.
First, ensure the kind Docker container is running on your machine:
$ docker ps
CONTAINER ID        IMAGE                  COMMAND                  CREATED             STATUS              PORTS                                  NAMES
8b855d80aff4        kindest/node:v1.14.2   "/usr/local/bin/entr…"   4 seconds ago       Up 1 second         58226/tcp, 127.0.0.1:58226->6443/tcp   clusterapi-control-plane
Export the kind kubeconfig and connect the the k8s cluster within the docker container and ensure you can connect:
export KUBECONFIG="$(kind get kubeconfig-path --name="clusterapi")"
kubectl cluster-info
Check to make sure all the pods are running:
$ kubectl get pods --all-namespaces
NAMESPACE                 NAME                                      READY   STATUS    RESTARTS   AGE
cluster-api-system        cluster-api-controller-manager-0          1/1     Running   0          49s
kube-system               coredns-fb8b8dccf-5ztkn                   1/1     Running   0          49s
kube-system               coredns-fb8b8dccf-dbp7m                   1/1     Running   0          49s
kube-system               ip-masq-agent-jwttw                       1/1     Running   0          49s
kube-system               kindnet-hn788                             1/1     Running   1          49s
kube-system               kube-apiserver-clusterapi-control-plane   0/1     Pending   0          3s
kube-system               kube-proxy-65jmv                          1/1     Running   0          49s
vsphere-provider-system   vsphere-provider-controller-manager-0     1/1     Running   0          49s
Once the vsphere-provider-controller-manager-0 pod is running, query the logs to find out what’s going on:
kubectl logs -n vsphere-provider-system vsphere-provider-controller-manager-0 -f
Check the above output for errors - they will be fairly obvious and the first character on each line of an error output it E i.e.:
E0626 12:29:35.675558 1 cluster_controller.go:143] Actuator...
Management Cluster
If your management cluster deployed fine, but the workload cluster is stuck - you can check it in basically the same way, except this time, just use the management cluster’s kubeconfig file:
kubectl --kubeconfig capv-mgmt-example/kubeconfig logs -n vsphere-provider-system vsphere-provider-controller-manager-0 -f
Just the same as the bootstrap cluster, look for lines in the output beginning with E if you are debugging deployment of workload clusters.
SSH into nodes
If you need to dive in a bit further as long as you ran export SSH_AUTHORIZED_KEY="$(cat ~/.ssh/id_rsa.pub)" as instructed before deploying your management or workload clusters, you can SSH into any of them with key based authorisation:
ssh ubuntu@node-ip-here
Then troubleshooting is just the same as it would be for the vSphere Cloud Provider on nodes you’ve provisioned yourself.
It’s important to note here that this should be used only to troubleshoot - a key tenant of ClusterAPI is that the infrastructure is meant to be immutable so SSH-ing in to change things is an anti-pattern. Instead, you should troubleshoot the problem, destroy the cluster, fix the deployment yaml files and re-deploy the cluster so that it is always in a known-good state and is consistent.
Deleting clusters
clusterctl comes with the ability to not only create, setup and expand clusters, but also to delete them. You need a few things passed into clusterctl to do this (for safety) - the kubeconfig and the provider-components.yaml files of the master cluster.
For example - If I wanted to delete the master cluster and all the worker clusters it deployed i’d run:
clusterctl delete cluster --bootstrap-type kind --kubeconfig capv-mgmt-example/kubeconfig -p capv-mgmt-example/provider-components.yaml
This will take about 5-10 minutes and cascading delete all the clusters you deployed, first it’ll delete the machinesets (workers) for each workload cluster, next it’ll delete the machines (masters) for the workload clusters and finally it’ll delete the management cluster itself - leaving your environment exactly as it was before you deployed anything.
Conclusion
Thanks for sticking with me through this whirlwind tour of ClusterAPI and CAPV - there are very exciting developments going on in this area, if you want to know more about the ClusterAPI ↗ roadmap ↗ or CAPV ↗, check out the links.
Why not follow @mylesagray on Twitter ↗ for more like this!